We use cookies to make your experience better. To comply with the new e-Privacy directive, we need to ask for your consent to set the cookies. Learn more.


How to Choose the Right MTB Saddle for Maximum Comfort on the Trail?

If you've ever cut a trail ride short because of a sore backside, you're not alone. Saddle discomfort is one of the most common issues beginner mountain bikers face, and it can turn an epic adventure into an exhausting chore.
The good news? With the right MTB saddle, you can ride longer, feel better, and actually enjoy the trail like you're supposed to. Whether you’re into flowy singletracks or technical downhills, a well-fitted mountain bike saddle makes a huge difference.
In this guide, we’ll walk you through the key things to know before choosing your next saddle, so you can focus on the ride, not the pain.
Step 1: Know Some Saddle Types & Their Functions
Before diving into fit or features, it’s important to understand the basic types of MTB saddles.
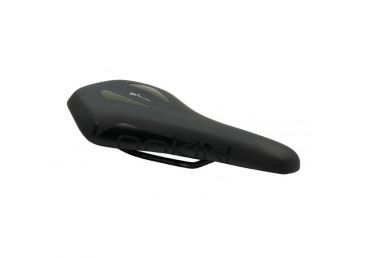
While mountain bike saddles may look similar at a glance, their shape and design can drastically impact your comfort, especially on longer or rougher rides. Here are three common types you’ll come across:
1. Flat Saddles: For Dynamic Riders

Flat saddles have a straight profile from nose to tail, giving riders more freedom to move around. This is ideal if you like to shift your weight frequently, like when climbing, cornering, or tackling technical terrain.
Cross-country (XC) riders or those who ride aggressively often prefer this type because it allows a more active riding style. However, if you stay seated for long periods, a flat saddle might feel a bit too firm or unsupportive.
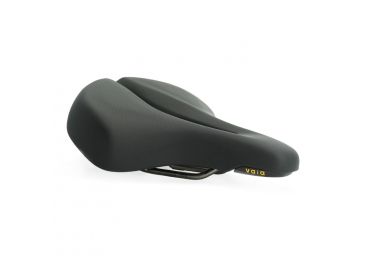
2. Curved Saddles: For Locked-In Support

Curved or "wave-shaped" saddles contour to your sit bones and help keep your body in a more fixed position. This can provide extra support and stability, great for longer trail rides or enduro sessions where you're seated for extended climbs.
The downside? Less freedom to move around, so they may not suit every riding style. But if you’re the type to stay planted and grind, this shape could be a game-changer for comfort.
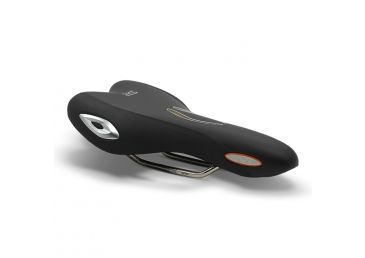
3. Cutout Saddles: For Pressure Relief

Cutout saddles feature a central channel or hole designed to relieve pressure from soft tissue areas, which can help prevent numbness or discomfort, especially during long rides.
While not everyone needs a cutout, many riders (especially those with more aggressive forward-leaning positions) find them helpful for reducing saddle soreness and improving overall comfort.
Step 2: Determine Your Riding Style
Not all mountain bikers ride the same, and your MTB saddle should match how and where you ride. Here’s how different riding styles impact saddle choice:
- Cross-Country (XC): Light & Efficient: XC riders spend a lot of time seated, pedaling hard over long distances. A lightweight, performance-oriented mountain bike saddle with a flat shape and minimal padding works best here. The goal is efficiency and power transfer, not plush comfort.
- Downhill (DH): Stability & Control: In downhill, you’re rarely seated, but when you are, it’s usually during short recovery moments.
DH saddles tend to be narrower and more compact, often with reinforced edges to handle crashes and aggressive riding. Look for durable materials over excessive cushioning. - Enduro/Trail: Balanced Comfort: Trail and enduro riders switch between seated pedaling and standing for descents.
A versatile saddle with a slightly curved shape and medium padding hits the sweet spot, providing comfort for climbs without restricting movement when things get technical. - Leisure Riding: All-Day Comfort: If your MTB rides are more chill or mixed with commuting and family trails, comfort takes priority. A wider, more padded saddle, possibly with a pressure-relieving cutout, can offer the plush support you need for relaxed riding.
Step 3: Consider Your Anatomy
Saddle comfort is also highly personal. Men and women often have different sit bone widths and pressure points, which is why some mountain bike saddles are gender-specific.
- Men’s saddles are typically narrower with a longer nose, designed to support a more aggressive, forward-leaning posture.
- Women’s saddles tend to be wider at the rear with a shorter nose, accommodating naturally wider sit bones and often including a cutout or relief channel for added comfort.
That said, anatomy varies, and gender-specific labels aren’t everything. Many riders of all genders find comfort in unisex saddles; what matters most is how well it fits your body.
Step 4: Saddle Width, Shape, & Material
Saddle fit comes down to three key elements: width, shape, and material.
1. Width: Match Your Sit Bones
The width of your MTB saddle should align with your sit bones, not too narrow to cause pressure, and not too wide to cause chafing. Some bike shops offer sit bone measuring tools, but you can also DIY it with a piece of cardboard or foil and a little pressure.
2. Shape: Flat or Curved?
We’ve covered this earlier, but it’s worth repeating: flat saddles offer freedom of movement, while curved ones provide locked-in support. Your riding style (and preference) will help decide.
3. Material: Foam vs Gel vs Leather
- Foam is lightweight and supportive, great for sporty rides.
- Gel offers plush comfort, especially for leisure riding, but can feel squishy or hot on long rides.
- Leather molds to your shape over time, offering a custom fit, but it requires break-in and care.
Also, consider saddle cover durability; abrasion-resistant materials matter for mountain bike adventures.
Step 5: Test Ride & Budgeting
No matter how good a saddle looks on paper, comfort is personal, and that’s why a test ride is crucial.
Many bike shops offer demo programs so you can try before you buy. Don’t skip this step, especially if you’re prone to saddle soreness.
As for budget:
- Under RM 150: Great for beginners or casual riders stepping into MTB. Expect comfort, but possibly heavier seats.
- RM 150–300: Sweet spot for trail and enduro riders, features like cutouts, ergonomic padding, and moderate weight.
- Above RM 300: Go here if you're serious about weight savings, durability, or tech like carbon rails or leather molding.
Remember: a quality MTB saddle is an investment in your comfort. It might cost more upfront, but it pays off in ride time and recovery.
Suggestions to Make an MTB Saddle More Comfortable

- Correct Saddle Height, Angle & Fore–Aft Position: A properly adjusted saddle is the foundation of comfort. Too high, and you’ll overextend, leading to hamstring strain; too low, and your knees and hips take a hit.
Keep the saddle nearly level (within ~3° is ideal) and aligned so that when your crankarm is horizontal, your knee is roughly over the pedal spindle. Fine-tune the fore–aft position using methods like KOPS to ensure efficient and pain-free pedaling. - Consider an Upgraded Seat Post: A quality seat post, especially a dropper post, can significantly enhance ride comfort. It allows easy adjustment of saddle height on the fly and can absorb trail vibrations that would otherwise transmit through your saddle.
- Use a Gel Saddle Cover: If you're not ready to invest in a new MTB saddle, try a padded gel cover. It smooths out pressure points and adds shock absorption. Just be aware it may hold moisture and slightly raise skin temperature.
Common Mistakes to Avoid When Choosing an MTB Saddle
- Choosing a Saddle That’s Too Soft: It might seem counterintuitive, but overly soft saddle pads can increase discomfort. Gel-heavy saddles may compress excessively, creating hotspots under your sit bones.
Opt instead for a medium-firm saddle that provides structural support with just enough cushioning. - Poor Saddle Installation: Even the perfect saddle won’t perform if it's poorly installed. Common issues include incorrect tilt, improper height, or rails not tightened securely. A tilted nose or uneven angle can cause soft-tissue pain. Double-check your setup after any ride.
- Skipping the Test Ride Before Trail Use: Only riding a saddle in a store or on the trainer won’t give you the full picture. Many beginners skip testing and end up sidelined by saddle soreness. Instead, test ride for at least 30–60 minutes on actual trails or better yet, borrow a saddle demo if available.
By paying attention to proper setup, choosing the right firmness, and thoroughly testing before committing, you’ll go a long way toward avoiding saddle sore and loving your MTB seat.
Read also
Conclusion: Comfort Is the Key to Better Mountain Biking
Finding the perfect MTB saddle isn’t just about style or brand, it’s about knowing your riding habits, understanding your body, and making small but smart adjustments.
Whether you're just starting out or upgrading from your stock saddle, the right fit can transform how you feel on the trail.
Remember, even the best mountain bike saddle needs to be set up correctly to truly shine. Don’t rush the decision. Take your time to explore different shapes, widths, and materials. Test ride when you can.
And if you're unsure, visit your local bike shop or Rodalink Malaysia to get hands-on advice. Because at the end of the day, the more comfortable you are, the longer and happier you’ll ride!
MTB saddle collection you might like